
They say when you have a child everything changes, which is true. Becoming a parent is scary and exciting. The first year is a complete blur and before you know if you’re planning the first birthday party. You blink and they are starting Kindergarten. They are coming home with copious amounts of paper and art that you just can’t manage to throw away, mom guilt is real. Creating a memory bin is an easy way to organize your kids’ art & school papers without feeling guilty.
With back-to-school here, this is the perfect time to get a memory bin created.
Mom truth, I don’t remember the first piece of art our daughter brought home. In fact, I couldn’t even name a favorite art piece. What I do remember though is how proud I was of her and how proud she was showing me what she made.
Every piece of art she brought home I thought was better than Picasso’s. Just kidding, sort of 😉 Before I knew it, we had a pile of art stacking up on the counter and nowhere to put it. It was becoming overwhelming. I couldn’t just throw this away, she had worked so hard on it. Plus the few times I did, she busted me while putting something in the garbage “Mom, why are throwing away my art?” Guilty as charged.
We had to get a handle on this growing pile of art and paperwork, so I turned to Pinterest to see what I could find and that’s where I discovered the school memory bin.
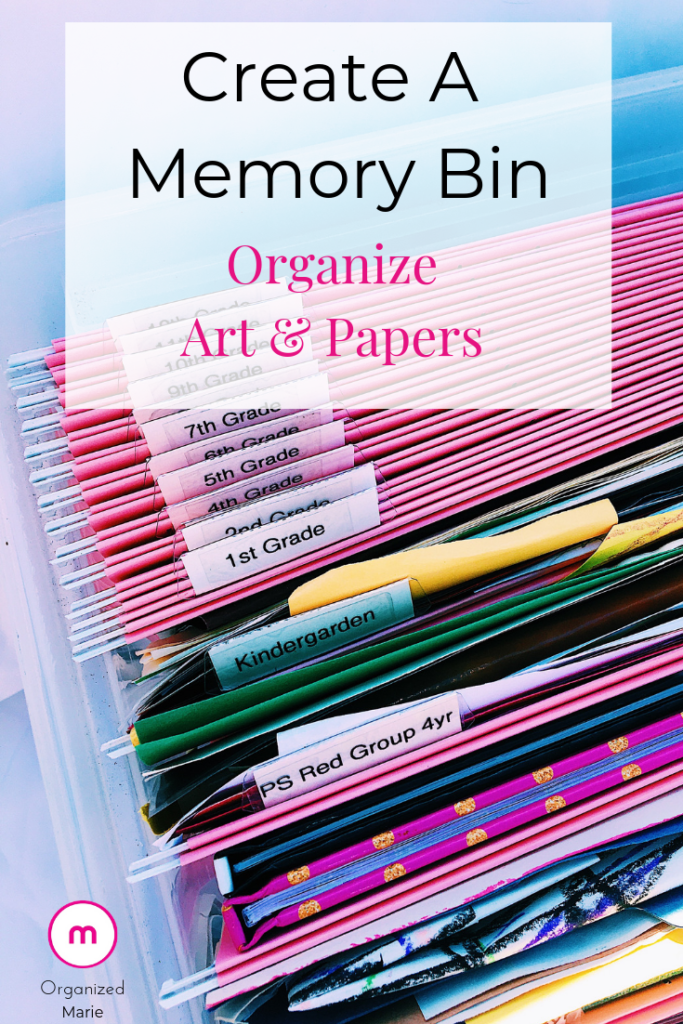
When I first saw the school memory bin, I knew this was the winner. It was a centralized location that could easily keep everything organized in one place. It was cute and looked like it was easy to manage.
How To Create A Memory Bin
1. Purchase Storage Bin(s)
The first step in creating a memory bin is to make sure you have one. These Iris storage bins come in a four-pack so if you have multiple kids, you can create all of them at the same time.
We had a few on hand so we didn’t need to buy any. There are two different sizes you can get. One is the letter size and the other one is the legal size. The legal size is a little bit bigger than the letter size which allows you to organize more art and paperwork.
Regardless of the size, the nice thing about these storage bins is they can easily be stacked.
2. Purchase Hanging File Folders
The next step is to buy hanging file folders to go into the bins. There are a variety of colors to choose from. I chose pink for our girls and gray for our son. Chose a color you enjoy looking at, we had the standard office greens one when I first made these bins and they weren’t very appealing to look at.
You do NOT need file folders and here’s why they don’t hold as much as a hanging file folder. Plus, it adds confusion trying to figure how what to label and where it should go. Not to mention the tab order of the files. It becomes frustrating when the order gets off because you’ve run out of file folders.
Using just the hanging files eliminates this frustration and saves you time when it comes to filing.
3. Create Labels
Creating labels for the tabs on the hanging file folders is the next step. If you have a label maker you are one step ahead. If you don’t have a label maker, be sure to purchase one when buying the bins and hanging file folders. Using a label maker gives you a font that’s crisp, clear, and easy to read.
If you have a label maker, here’s a list of labels that you can make now so that when your purchases arrive they are ready to go.
- Baby Shower
- Birth
- Birthday Cards
- Preschool
- Kindergarten
- 1st Grade
- 2nd Grade
- 3rd Grade
- 4th Grade
- 5th Grade
- 6th Grade
- 7th Grade
- 8th Grade
- 9th Grade
- 10th Grade
- 11th Grade
- 12th Grade
- Awards
- Report Cards
- Sports
- Misc.
If you have more than one child, create multiple labels at the same time to save you time.
4. Label the tabs
Once the hanging file folders have arrived, it’s time to start labeling the tabs. Label all the tabs before putting them in the hanging file folders. It’s much easier to get them on straight.
The other tip is to put on the label first and then cut off the excess label tape. It’s much easier to put on the label first because if you cut the label too short before putting it on the tab it’s a bit more difficult.
5. Put tabs on hanging files
There are two ways to assemble the tabs. The first way is to insert each tab in the same location in every file folder. For example, all of the tabs are located on the left side or right side. I prefer this method because the labels look neater, they are in a straight line.
The second method is to stagger them where they line up across the tab.
6. Sort the artwork and papers into piles & purge
Take the pile of artwork and paper you have and sort the pile into categories by the labels you created (Preschool, Kindergarten, etc.). Once the piles have been created, start purging through each pile.
Once you have purged, put each pile into the file hanging folder.
7. Keep the bin somewhere that is easy and convenient
Put the bin where you will use it, somewhere that makes it easy to file away your child’s papers.
After you have the memory bin established, you will find it easier to make decisions on what should go in there. There is a limited amount of space in there and you can’t keep everything.
You will find over time, that some things that you absolutely love will change because space needs to be cleared up for more.
Here is a tip that has saved us time when it comes to deciding what to keep and what to get rid of, we batch process. Meaning, if there is a piece of art that we’re having a tough time making a decision on, it automatically goes into the storage bin. At the end of the school year, we take the file out and go through it.
There are some pieces at the time that we loved but after comparing them to others, we didn’t need to keep them. Going through all the art at one time makes it easier to make decisions because we can compare the pieces.
Conclusion
Having a memory bin makes it easier to keep all of the artwork and important paperwork organized. When the time comes for them to head off to college or move out of the house, all you’ll need to do is give them their memory bin.
Product Recommendations


+ show Comments
- Hide Comments
add a comment