
Systems are key to getting and staying organized, they are what will set you up for success. Creating a pantry organization system may see like a daunting task but with the right tips and tools, you can shape up your pantry in no time. ![]()
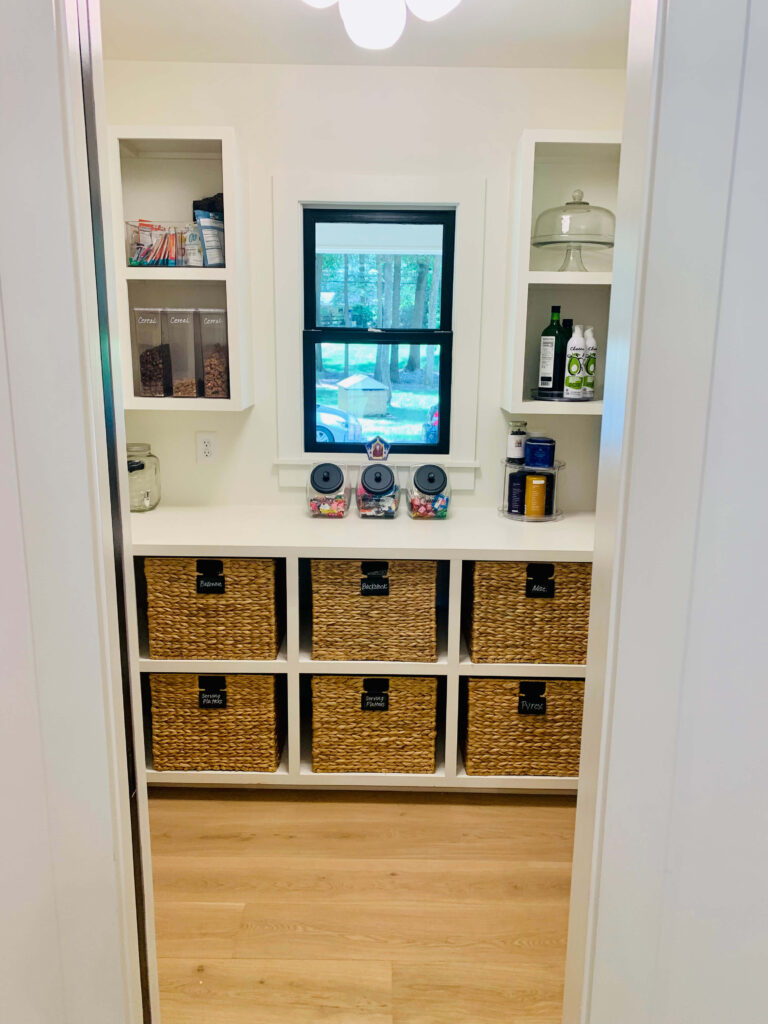
![]() Having a pantry organized makes it easier to plan meals and bake all the things. You know what you have and what needs to be added to the grocery list, limiting the number of trips to the store and avoiding the madness at all costs.
Having a pantry organized makes it easier to plan meals and bake all the things. You know what you have and what needs to be added to the grocery list, limiting the number of trips to the store and avoiding the madness at all costs.
Affiliate Disclosure:
We want to be transparent and inform our users that some of the links on this website are affiliate links. This means that if you make a purchase through these links, we may earn a commission, at no additional cost to you. We only recommend products or services that we believe will add value to our readers. Your support through these affiliate links helps us maintain and improve our content. Thank you for your support!
THE BENEFITS OF AN ORGANIZED PANTRY
Having an organized pantry offers numerous benefits that go beyond just aesthetics. An organized pantry allows you to:
Save Time: Imagine never having to search through piles of items again. With a well-organized pantry, you can quickly locate the ingredients you need, saving valuable time during meal preparation.
Reduce Food Waste: How often have you discovered expired or forgotten items hidden at the back of your pantry? An organized pantry ensures that everything is visible and easily accessible, reducing the chances of food going to waste.
Save Money: By knowing exactly what you have in your pantry, you can avoid duplicate purchases and unnecessary grocery trips. This not only saves money but also helps you plan meals more efficiently.
Inspire Creativity: A cluttered pantry can be overwhelming and may hinder your creativity in the kitchen. A well-organized pantry, on the other hand, sparks inspiration and allows you to easily see and access a wide range of ingredients, encouraging culinary experimentation.
Maintain a Healthy Lifestyle: An organized pantry makes it easier to keep track of your inventory, ensuring that you always have a variety of nutritious options on hand. This can help you make healthier choices and stick to your dietary goals.
ASSESSING YOUR PANTRY SPACE AND NEEDS
Before diving into organizing your pantry, it’s important to assess your available space and specific needs. Grab a piece of paper and pen to outline your pantry. A few planning steps will save you in the long run.
Here are a few factors to consider during the assessment:
Pantry Size
Determine the size of your pantry, including the shelves, cabinets, and any additional storage areas. This will help you plan the layout and choose appropriate storage solutions.
Functional Zones
Identify the different zones within your pantry based on the types of items you regularly store. This could include zones for canned goods, snacks, baking supplies, spices, and more. Understanding your specific needs will guide the organization process.
Traffic Flow
Consider how you typically move around your kitchen and pantry. Organize your pantry items in a way that aligns with your natural flow, making it easier to navigate and locate items quickly.
OPTIMIZING SPACE WITH STORAGE SOLUTIONS
When it comes to maximizing space in your pantry, storage solutions are key. Here are some ideas to help you make the most of every inch:
Stackable Storage: Invest in stackable storage containers to make efficient use of vertical space. Stackable containers are ideal for items like pasta, rice, and snacks.
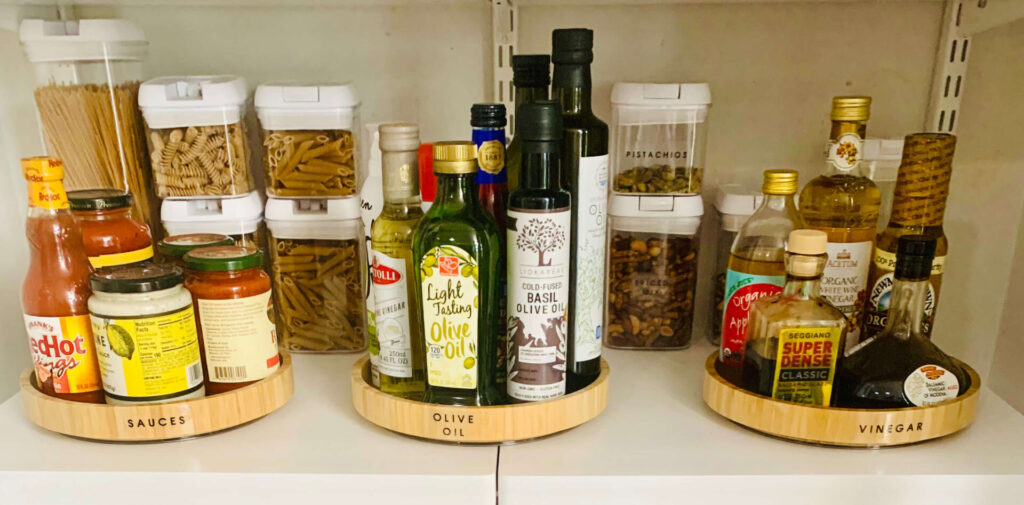
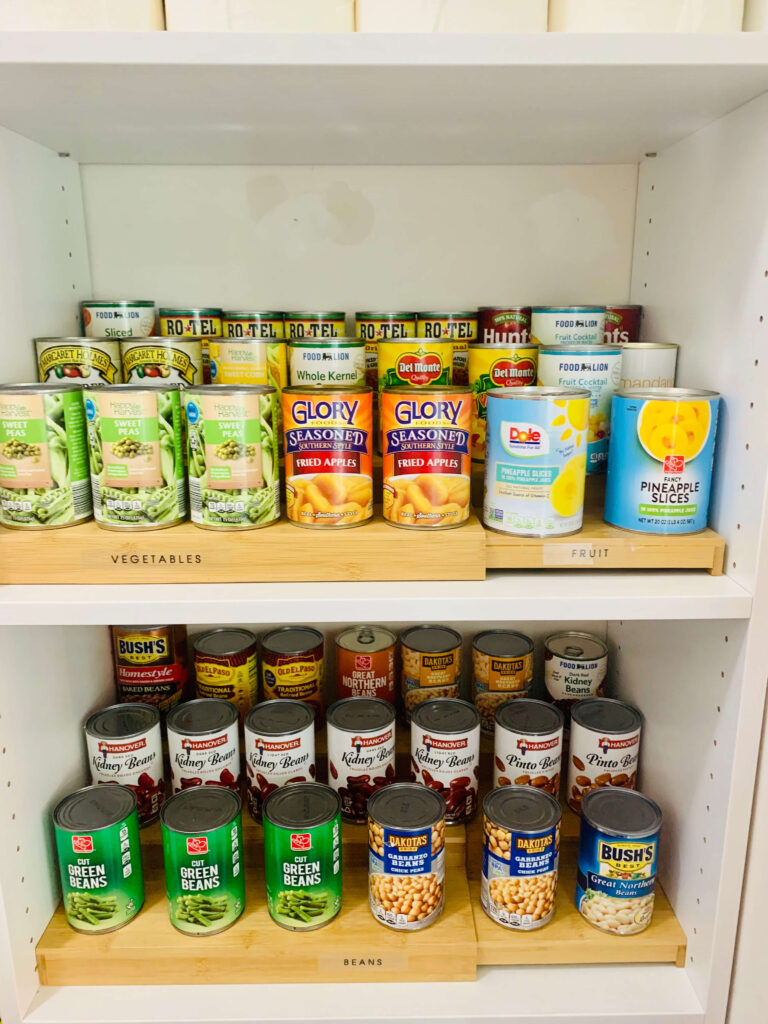
Lazy Susans: Lazy Susans are perfect for keeping items within easy reach. Use them for spices, condiments, or even canned goods. Simply spin the turntable to find what you need without digging through cluttered shelves.
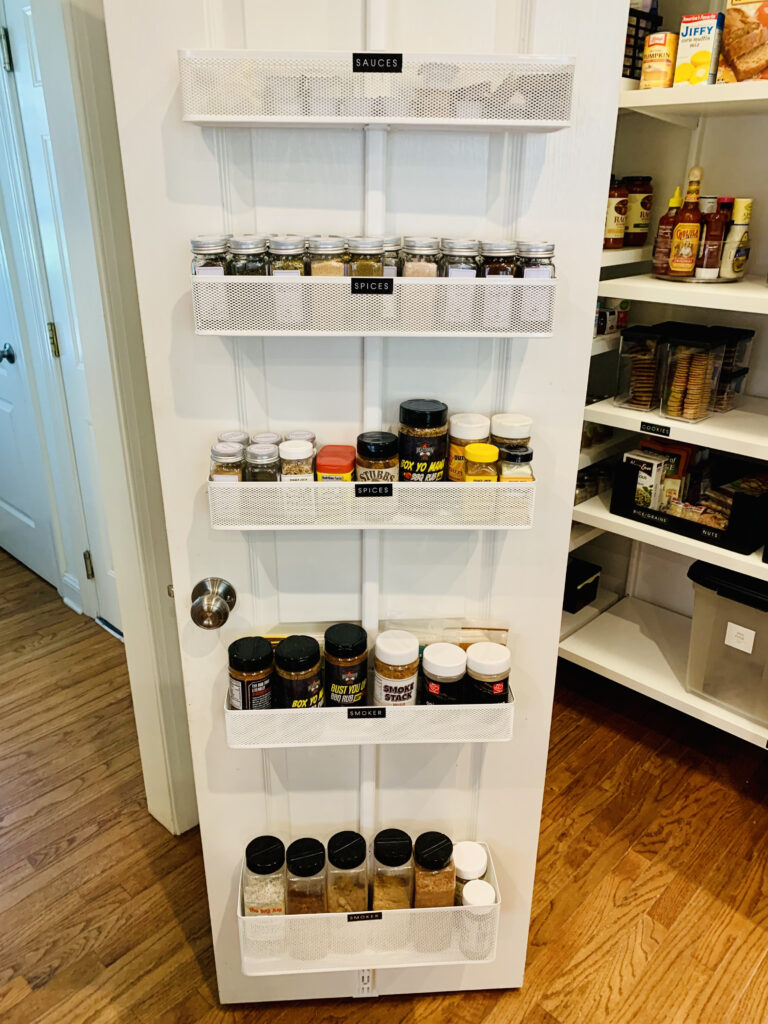
Door-Mounted Racks: Utilize the inside of your pantry doors by installing door-mounted racks. They are great for storing items like spices, baking sheets, or even cleaning supplies. This frees up valuable shelf space for larger items.
Expandable Shelf Organizers: Expandable shelf organizers are versatile tools that can help you create additional storage space. They are adjustable and can be customized to fit your specific needs.
STEPS TO CREATING A PANTRY ORGANIZATION SYSTEM
Now that you know the benefits of having an organized pantry, have accessed it, and know what products to use, let’s get into the exact steps to create a pantry organization system that serves you.
Step 1: Empty
Everything comes out of the pantry. This allows you to get an idea of what you have, plus you start with a clean slate.
Step 2: Sort & Purge
Group similar items together based on their category. For example, group all your canned goods, baking supplies, snacks, and grains separately. This will make it easier to organize and find items later. Check expiration dates and toss anything that is expired.
Step 3: Organize
Now comes the fun part, organizing! Before running to the store to buy a plethora of bins. It’s important to map out a plan for your pantry. Create zones for each category.
The layout of your pantry plays a crucial role in maximizing space and efficiency. Optimize space by using stackable storage bins. This allows you to store items of varying heights and prevents wasted space.
Keep frequently used items within easy reach. This includes everyday staples like cooking oils, spices, and frequently used canned goods.
If your pantry has lower cabinets or drawers, use them to store heavy items like bags of flour or bottles of water. This will prevent any potential accidents and ensure stability.
Don’t overlook the inside of your pantry doors. Install door-mounted racks or hooks to store small items like measuring spoons, kitchen towels, or even a shopping list.
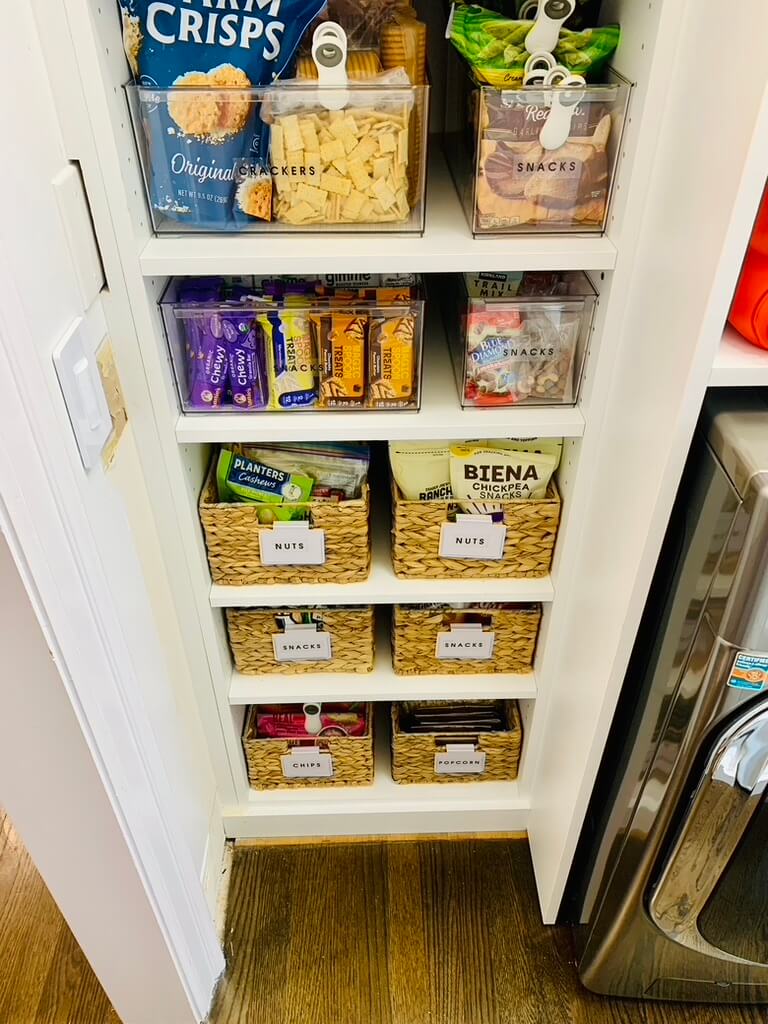
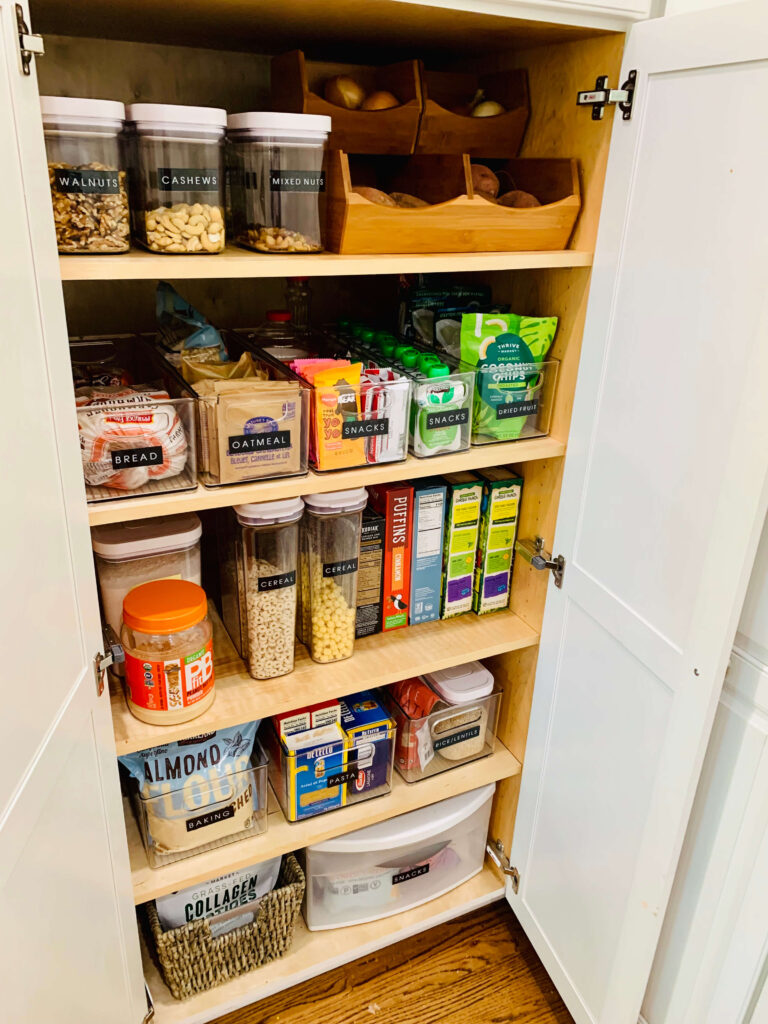
After everything has been put into the pantry, label the bins and canisters for effortless maintenance.
Step 4: Maintain
Once you’ve organized your pantry, it’s important to establish a maintenance routine to keep it in top shape. Here are some tips to help you maintain an organized pantry:
Regularly Check for Expired Items: Set a reminder to regularly check for expired items in your pantry. Discard anything past its expiration date to prevent clutter and maintain freshness.
Practice First-In, First-Out: When restocking your pantry, follow the first-in, first-out principle. Place newer items behind older ones to ensure that older items are used first. This helps prevent food waste and ensures that nothing gets forgotten.
Put Items Back in Their Designated Spots: Encourage everyone in your household to put pantry items back in their designated spots after use. This will help maintain the organization system and prevent clutter from building up.
Clean Regularly: Set aside time periodically to clean your pantry. Wipe down shelves, remove any spills, and vacuum or sweep the floor. A clean pantry not only looks inviting but also helps maintain the freshness of your stored goods.
Reassess and Reorganize: As your pantry needs change, take the time to reassess and reorganize. Remove any items you no longer use and adjust your organization system accordingly. This will ensure that your pantry remains functional and clutter-free.
PANTRY ORGANIZATION TIPS
Here are a few additional tips and to help you take your pantry organization to the next level:
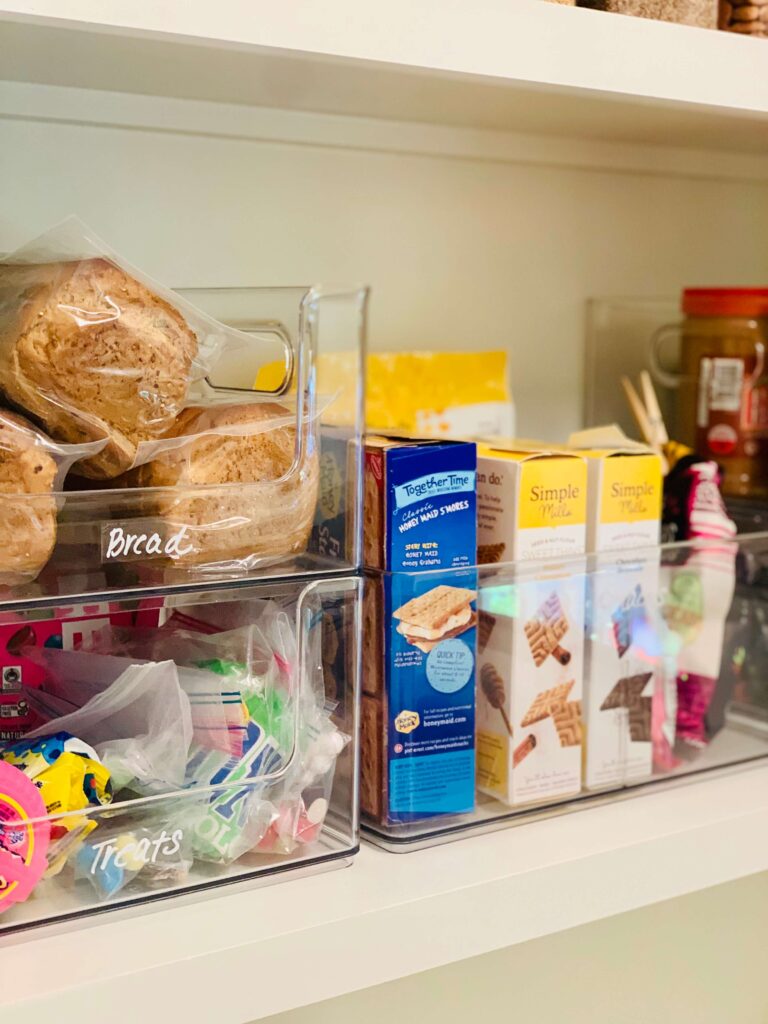
- Utilize Clear Storage Containers: Transparent storage containers allow you to see the contents at a glance, eliminating the need to open multiple containers to find what you need.
- Invest in Adjustable Shelving: Adjustable shelving units give you the flexibility to accommodate items of different heights. They allow you to utilize vertical space more efficiently and adapt to changing pantry needs.
- Group Items by Meal or Recipe: Consider grouping items together based on meals or recipes. For example, create a designated section for Mexican cuisine, Italian dishes, or breakfast ingredients. This makes meal planning and prep a breeze.
- Create a Shopping List Station: Dedicate a small area in your pantry for a shopping list and pen. This ensures that you can quickly jot down any items you need to restock, preventing unnecessary trips to the grocery store.
FINAL THOUGHTS
By following these tips, you can transform your pantry into an organized and efficient space that streamlines your cooking process and makes lunches a breeze. Enjoy the benefits of saving time, reducing food waste, and maintaining a healthy lifestyle.
With a perfectly organized pantry, you’ll find joy in cooking and have the inspiration to create amazing meals.
Remember, a perfectly organized pantry is not built in a day. It requires time, effort, and regular maintenance. Stick to the organization system you’ve created and adapt it as needed. With consistency and diligence, you’ll enjoy the benefits of a perfectly organized pantry for years to come.


+ show Comments
- Hide Comments
add a comment